All new TrulyWP WordPress sites start with something called a “built-in” domain name. This built-in domain name is referred to as your unique TrulyWP subdomain. Usually, within a few minutes of setting up your WordPress installation, you should be able to view your WordPress site, log into it and get on with using it. However, we understand you may not want to continue using your website under a subdomain like your-wp-site.trulywp.com. While it may help you get started immediately, you might want to point your own, custom domain to it.
We have listed below the steps to point your domain.
Step 1:
Login to https://backstage.trulywp.com/. Click on the Sitename of your site in the Sites tab.
Step 2:
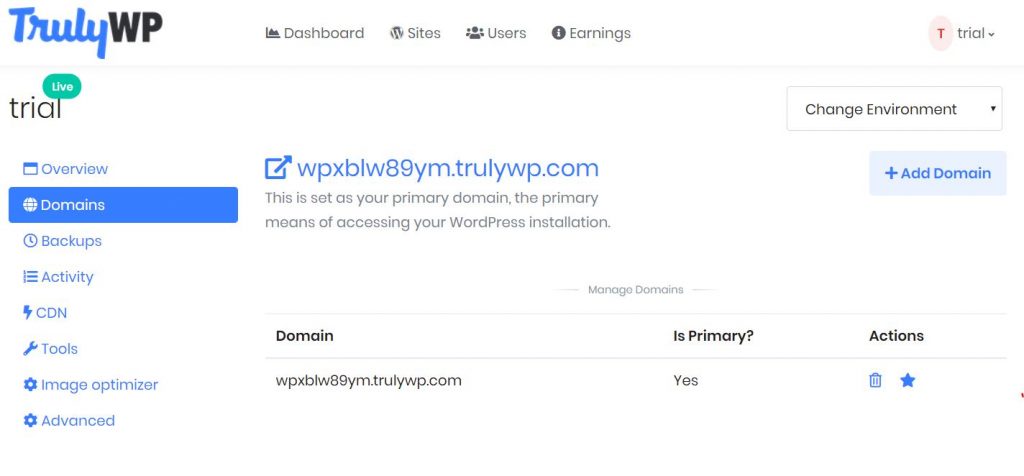
Go to “Domains” on the sidebar. And click “Add Domain”.
Then, Enter the URL of your website in the textbox. Repeat it again for another domain (www) as shown below.
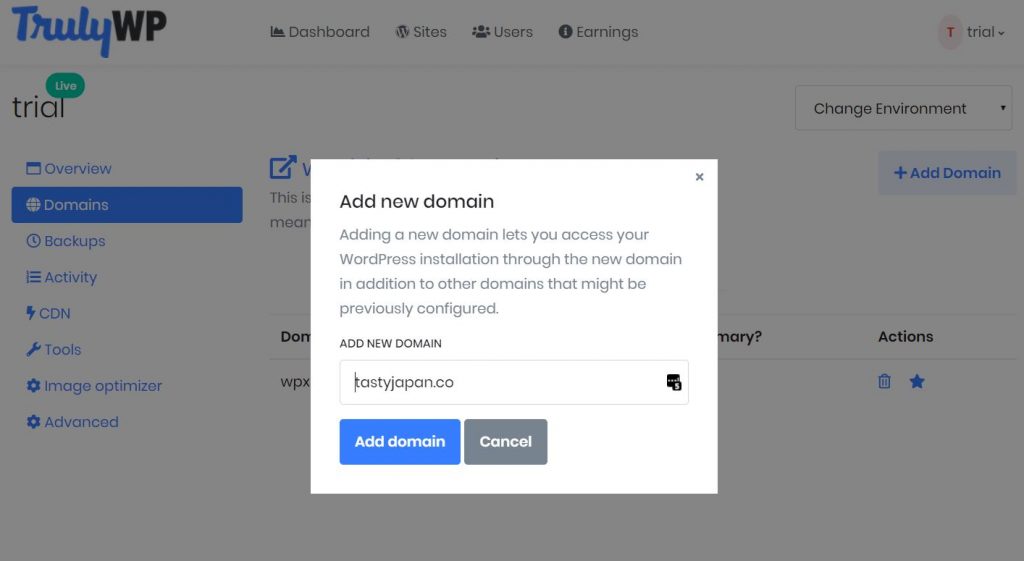
IMPORTANT NOTE: You have to add two domains as shown below so that you can access your domain via its www version as well.
Step 3:
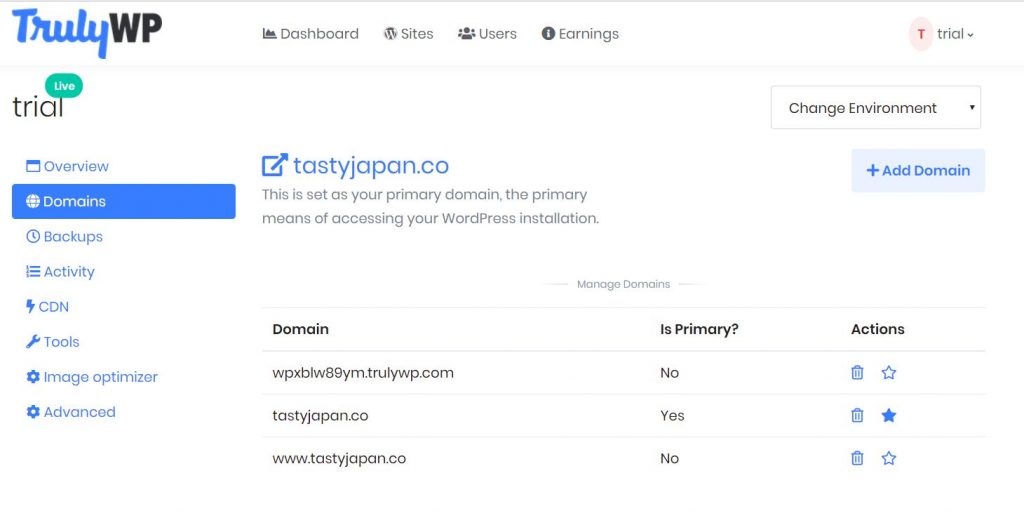
Make your domain as primary by clicking on the star on the right.
Step 4:
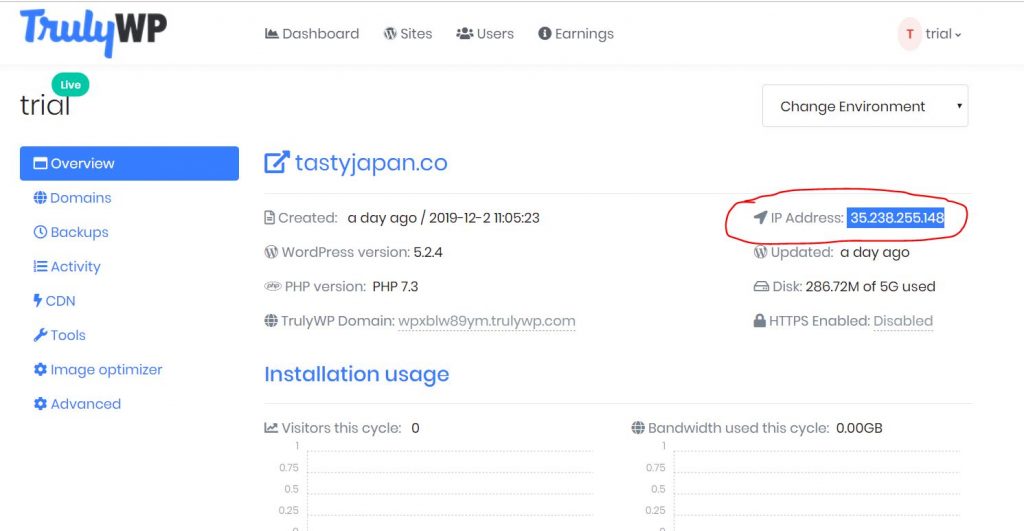
Now click the “Overview” on the Sidebar and copy the IP address on the right corner.
Step 5:
Now, Login to the site where you purchased your domain. Or if you are using 3rd party DNS settings managers like Cloudflare, please go there.
Step 6:
Find the DNS options where it lets you add host records and add TrulyWP Host Records as follows.
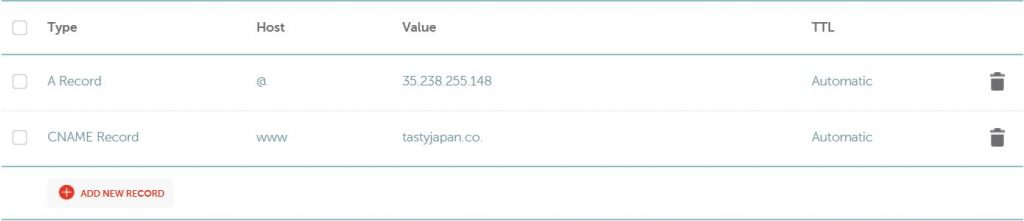
You will have to add an “A Record” and “CNAME Record” as shown above.
For “A record”,
- Set Host as “@”
- Set Value as the IP Address you copied
- And set TTL as “Automatic”
For “CNAME Record”,
- Set Host as “www”
- Set Value as your domain name, ‘example.com’
- And set TTL as “Automatic”
Now Everything is Set Up. You just have to wait for 10 minutes for the changes to happen.
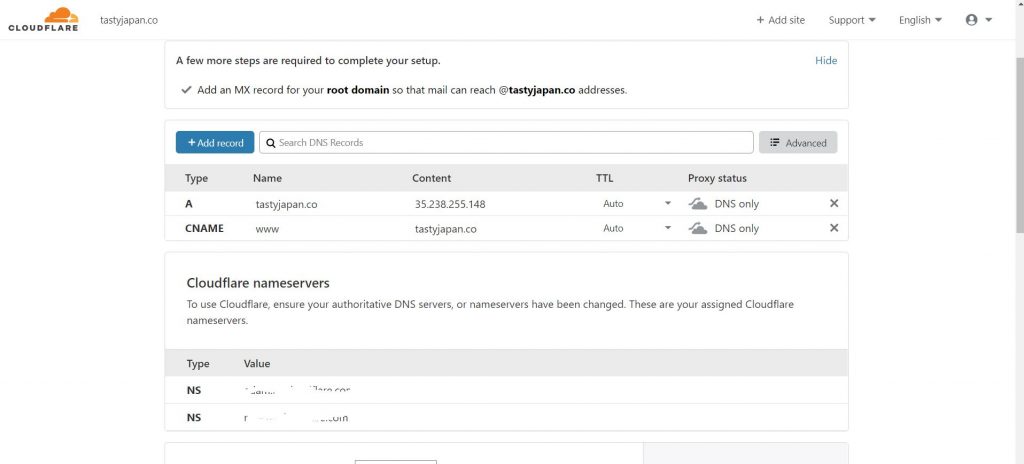
IMPORTANT NOTE:
If you’re using Cloudflare for DNS settings, then it is important to turn off the Cloudflare proxy status for A record and CNAME record.
For this,
Login to your Cloudflare account.
Go to DNS settings.
And turn off the proxy status as shown below.
You can also go to SSL/TLS settings in Cloudflare and choose the “Full (strict)” option.
You can verify if the DNS propagation for your domain is completed by checking in whatsmydns.net.
Some common mistakes are:
- Viewing the page before the propagation will result in a 404 error. You just have to wait for some time until the propagation is fully complete.
- Failure to remove host records pointing to your previous host
- Failing to add the required Host Records.
- Failing to Set the domain as “primary”.
- Failing to copy the IP address properly.