You can enjoy the great speed and performance offered by TrulyWP Premium WordPress Hosting for your WordPress websites by migrating your existing WordPress site (source WordPress installation) to TrulyWP without losing anything.
Here is the step-by-step guideline to easily migrate your website to TrulyWP Premium hosting.
The Installation Guide:
Step 1:
Create a new WordPress installation in TrulyWP (the target WordPress installation)
To create a site in TrulyWP, login to your https://backstage.trulywp.com/ with your credentials. Once logged in, you will see the below screen.
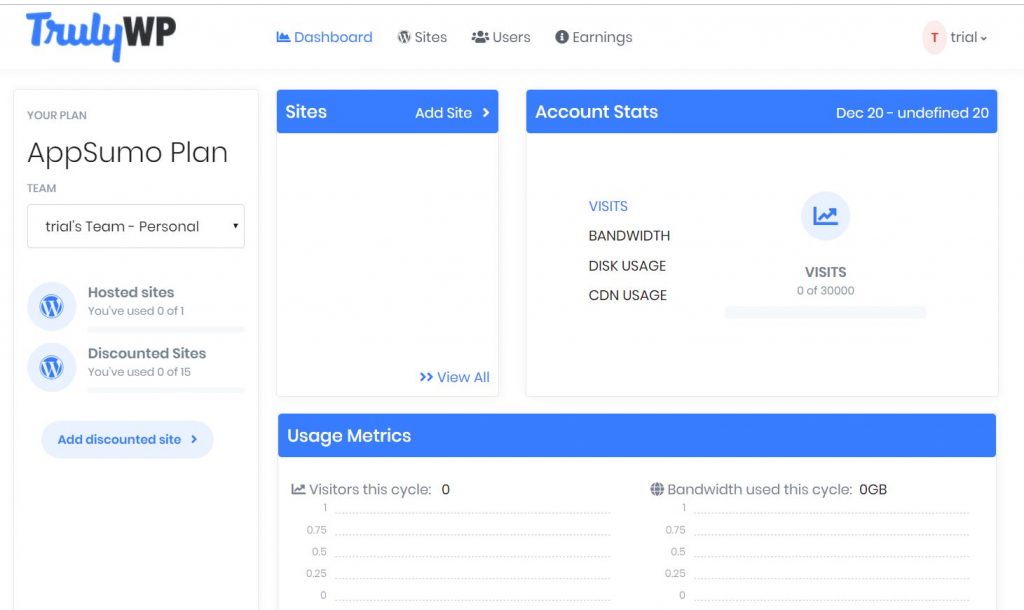
You could see Sites, Account Stats and Usage Metrics tabs as above.
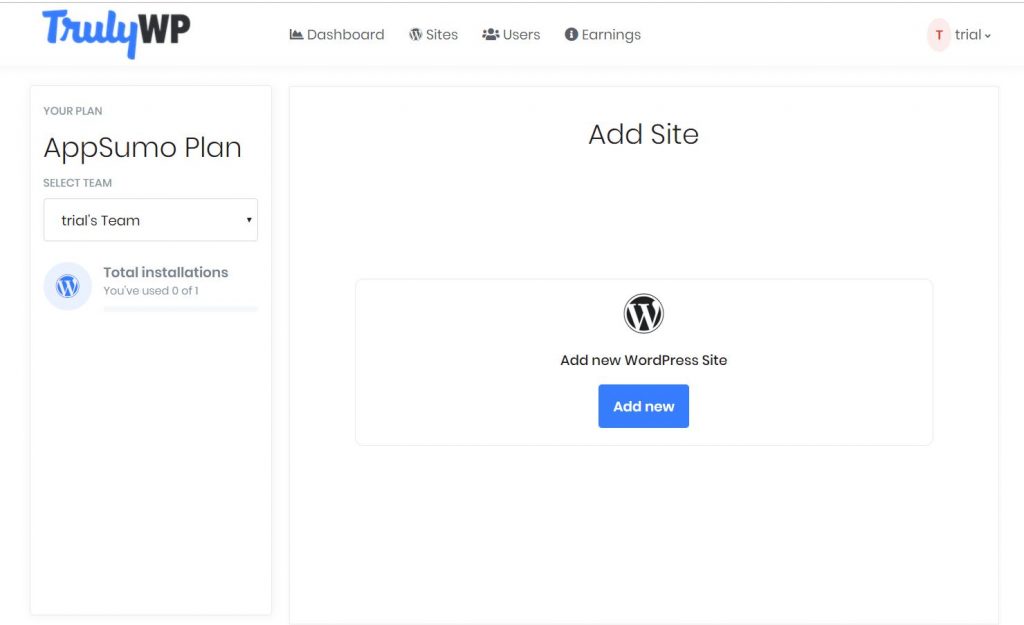
Step 2:
Click the “Add Site >” button in the Sites tab and then click Add new WordPress site.
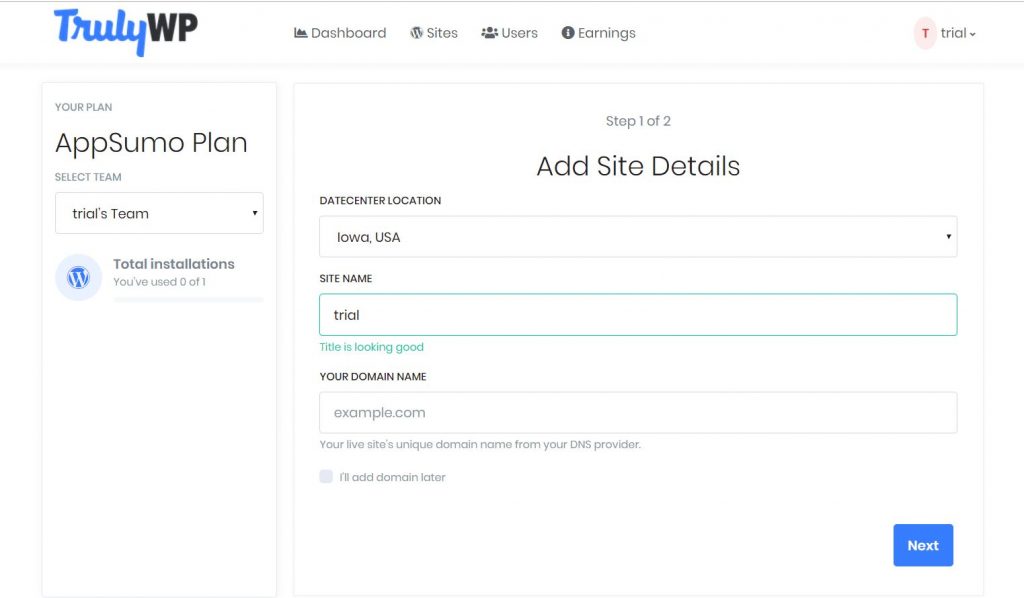
Step 3:
Next, Add the site details (DATACENTER LOCATION, SITE NAME, YOUR DOMAIN NAME) in the specified columns. If you haven’t purchased the domain yet, You can select the checkbox “I’ll add domain later”.
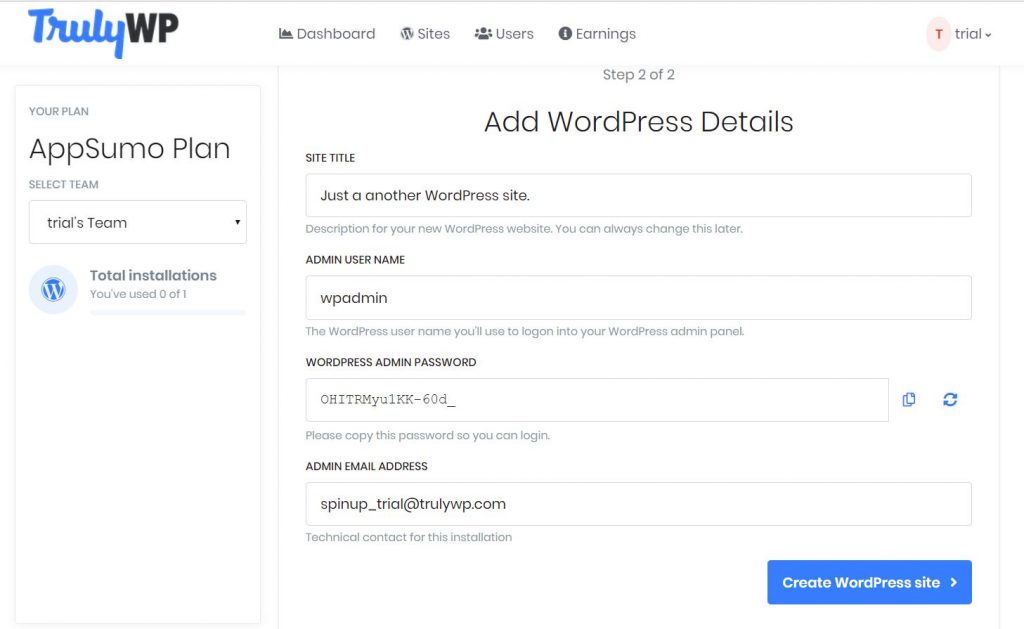
Step 4:
After adding the site details, You have to add WordPress admin details (SITE TITLE, ADMIN USER NAME, WORDPRESS ADMIN PASSWORD, and ADMIN EMAIL ADDRESS).
{IMPORTANT NOTE: Make note of the admin username and password to log in to WordPress admin panel or dashboard.)
Step 5:
Click “Create WordPress Site” and Wait for 2 to 3 minutes until it has been created successfully.
This is IMPORTANT. You can check if the installation is complete by opening https://backstage.trulywp.com/ in a new tab in your browser.
You can see your site name displayed under the Sites tab.
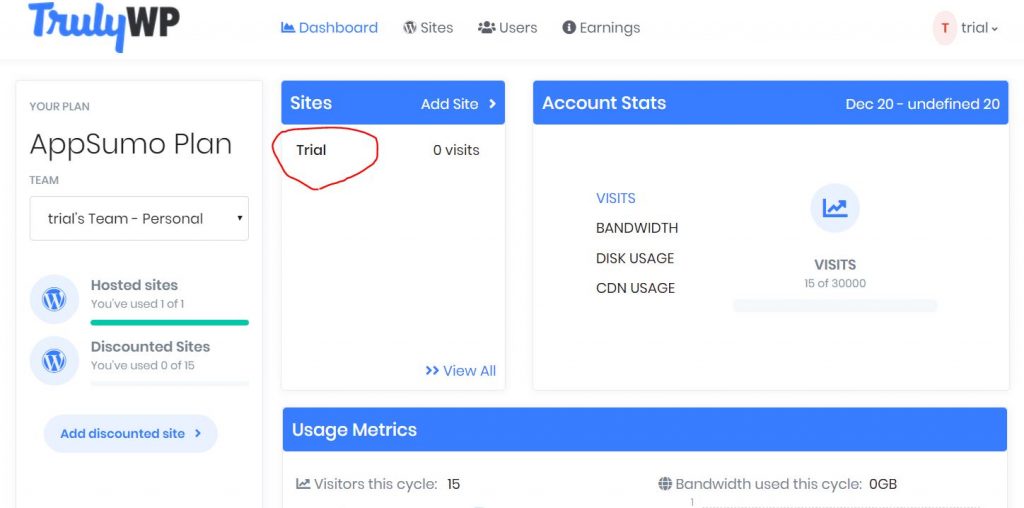
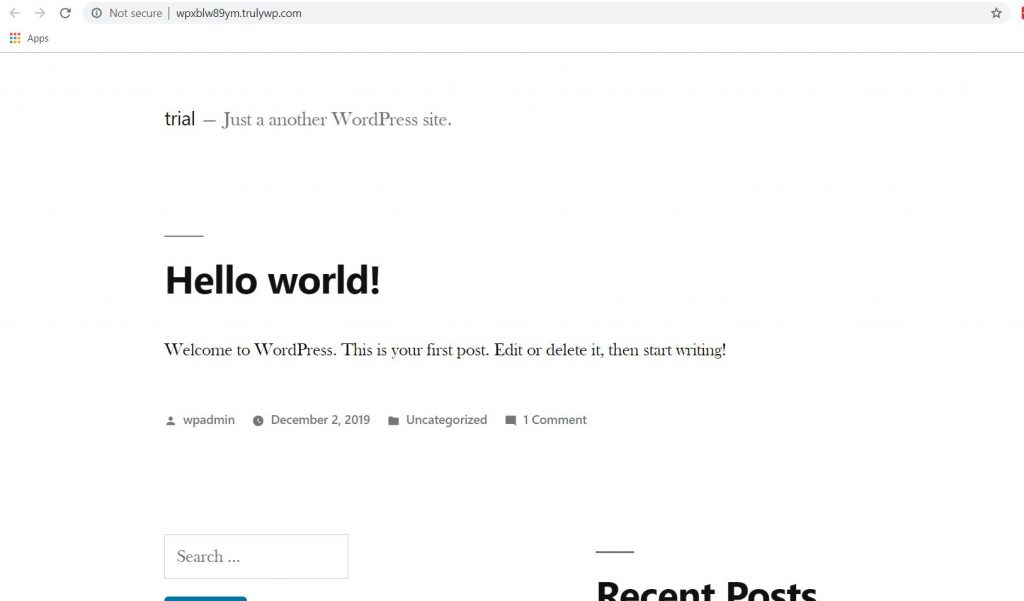
Now, Click the Site name and you can view the below screen.

You can see a TrulyWP URL. When you click it, you are navigated to the WordPress site where the migration should happen.
Generating Migration File:
Step 1:
Login to the admin panel of your Current Site or the Source Site.
Step 2:
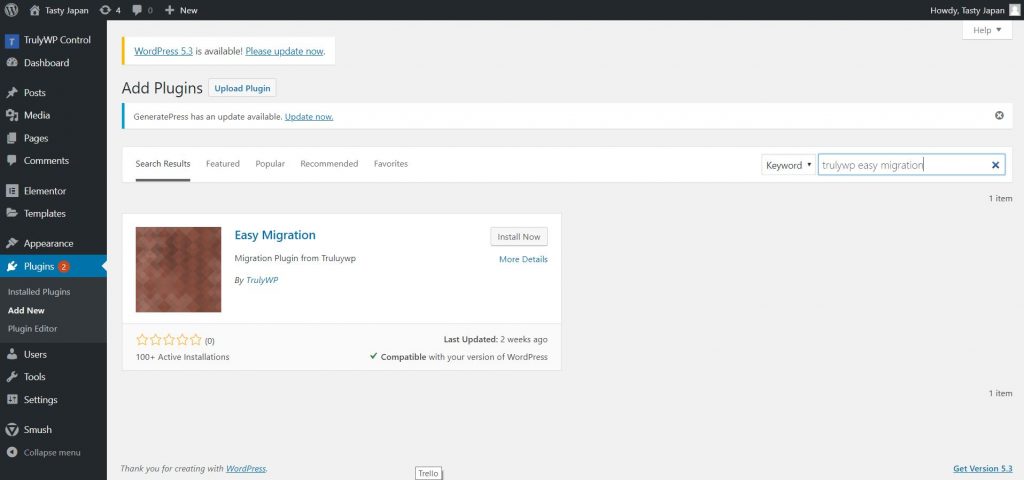
In your WordPress dashboard, Go to Plugins and click “Add New”.
Step 3:
Search for “TrulyWP Easy Migration”.You will find Easy Migration TrulyWP plugin in the WordPress plugins repository (you can also download them at https://wordpress.org/plugins) and install the same in your source site.
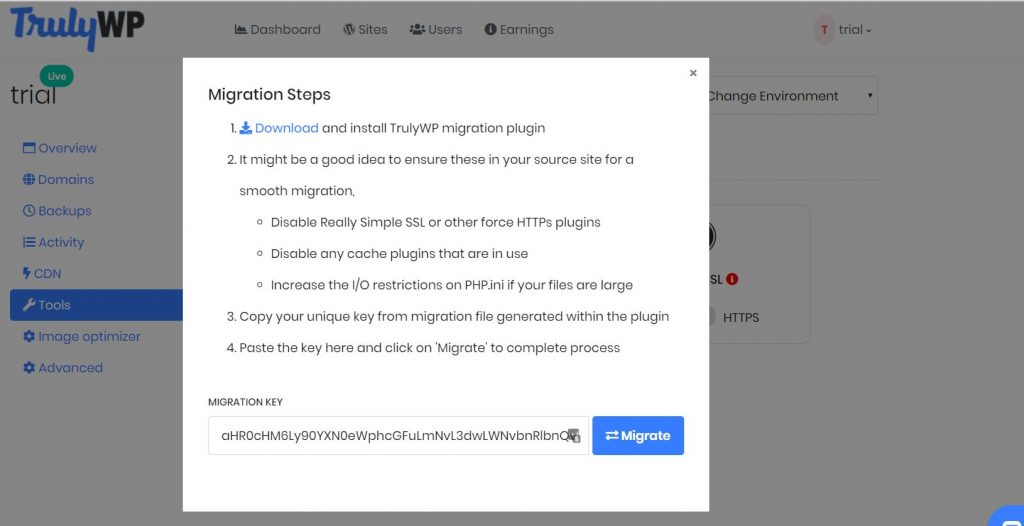
Precautions to be taken before generating the file:
-
- Disable Really Simple SSL or other force HTTPs plugins
- Disable any cache plugins that are in use
- Increase the I/O restrictions on PHP.ini If your files are large
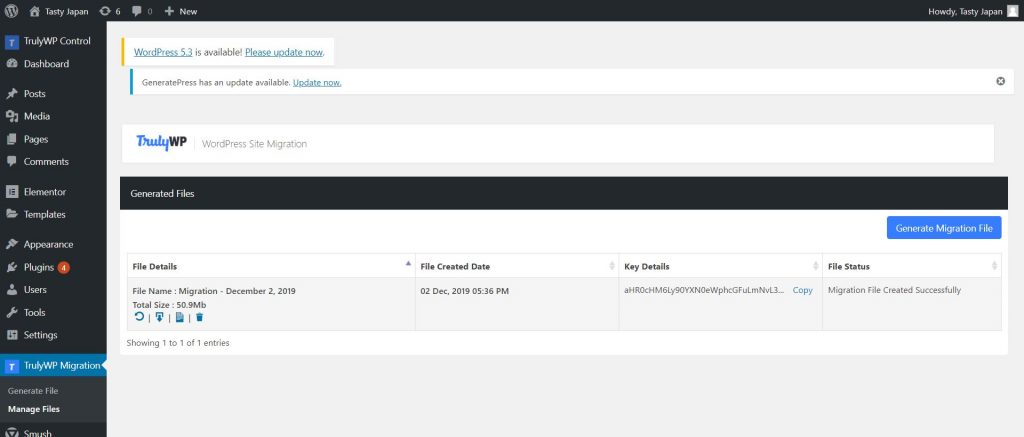
The migration file generation will automatically start. If not click the button “Generate Migration file”.
IMPORTANT NOTE: Do not refresh the browser during the process.
After the process is complete, You will see a table that contains File Details, File Created Date, Key Details and File Status.
Step 4:
Copy the Migration Key given under Key details.
The Migration Process
Step 1:
Go to https://backstage.trulywp.com/ .
Step 2:
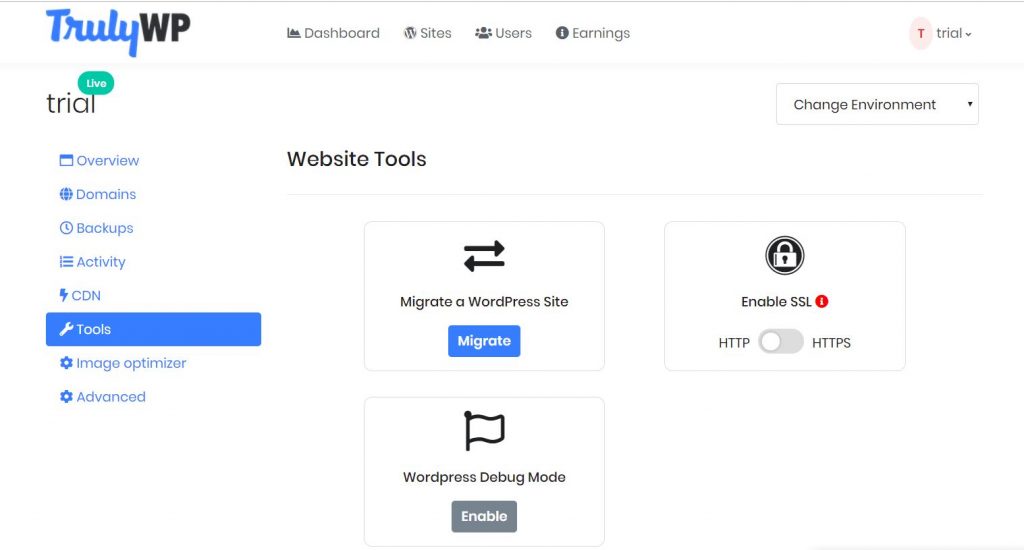
In the dashboard, Go to “Tools” and click “Migrate”.
Step 3:
In the given textbox, paste the copied Migration key and click “Migrate”.
The migration will run for some time depending upon the size of your site.
Step 4:
After the migration is complete, Go to “Overview” in the backstage dashboard and open the TrulyWP hosting URL in another tab.
If the site loads perfectly as your previous site, Then the migration is successful.
Migration File Generation Stuck – Fixes
Your site set up in your current host can be blocking the generation of migration files. Please check if everything is set as follows and if not, make these changes before trying to generate file again.
- Check the permissions that are set this way for the wp-content folder
– 755 for all folders
– 644 for all files inside
Access the folders via Filezilla or any other FTP methods and change the permissions as above.
- The migration fails can also be due to the time limit set in the PHP config file (php.ini). Access the php.ini file using Filezilla or any FTP methods and search for “change max_execution_time” in the PHP config. Set it as -1 (for unlimited execution time).
- You can also increase the PHP Memory Limit for an increase in the speed of the operation
- Disable Really Simple SSL or other force HTTPs plugins in your source site.
Also, Disable any cache plugins that are in use.
This should migrate the file in most cases. If this doesn’t fix it you might have to do a manual migration using SFTP(like Filezilla). The SFTP details are given on the TrulyWP backstage dashboard to access.
A successful migration is dependent on making a connection with your current host’s servers and then fetching the migration files generated there. Your current host might be blocking this process due to slow server response times. You can try the process once again to see if the migration works.
If not, you can submit a ticket for failed migration in the tools>migrate section itself.
The next article is about setting up the domain URL: Setting Up Custom Domain