Developing a WordPress website on a staging environment is an excellent idea for building and testing changes without affecting the live site. WordPress staging is excellent for testing new WordPress plugins, versions, and general development work. Each WordPress install at TrulyWP comes with its staging environment, which is entirely separate from your live production site. With TrulyWP you can create a dev staging site in just a matter of minutes and share with your team.
If you are a development agency or an individual developer, a WordPress staging environment is a great way to accelerate the development workflow and delivery of mockups to clients for assessment before deployment to the live website.
WHAT IS A STAGING ENVIRONMENT?
A staging environment also referred to as a staging website are, is a replica of your live site. Here you can test any subsequent changes or improvements to your project without disrupting your live site. Once you have ensured optimal functionality, then you can “push” or deploy content to your live site.
HOW TO CREATE WORDPRESS STAGING ENVIRONMENT
Every WordPress site launched on TrulyWP comes with its staging environment. Once you are done working on the staging site, point a domain and push your new content to the live site by just pressing a button.
On TrulyWP, launching a WordPress based server is only a matter of a few clicks. It is assumed at this stage; you already have an account with TrulyWp. If not, create one from <here>
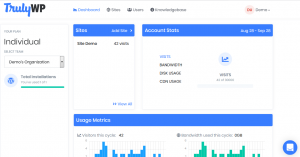
Once your new account has been verified, log on to your TrulyWP dashboard and click on “sites” in the left navigation. A list of your installed sites appears. Click on the one you would like to add to a staging area. Click on “staging” from the drop-down menu at the top right, then click on the “Create a staging Environment” button.
The URL structure for every staging area appears on TrulyWP as follows: https://staging-sitename.trulywp.cloud. If you have SSL enabled on your live site, SSL will also be enabled on your staging site.
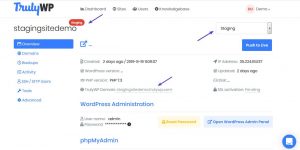
You should wait for 10-15 minutes for initial staging to be created alongside DNS propagation. After initial staging is set up, a separate control panel is generated containing your connection information, DNS, backups, tools, and plugins for your staging environment. You can launch PhpMyAdmin from within the dashboard.
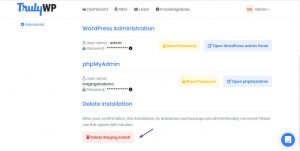
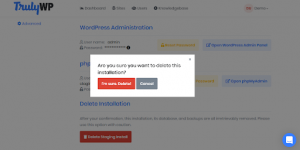
Delete and refresh the staging environment to delete your staging environment, click on “delete staging environment” from the dashboard. It should be noted that deleting a staging environment erases all of the site data, including files, databases, and staging backups. To delete a staging environment on Trulywp, type the site name, followed by a dash and the word “staging” (SITENAME-staging) in the field provided then click on the “delete this environment” button. A screenshot is shown below:
To refresh your staging environment, you do this by deleting any previous staging environment and then create a new one. This new environment will contain the most recent version of your production database and files for testing. Alternatively, you can restore a backup from your production site to staging.
HOW TO PUSH STAGING TO LIVE
Pushing your staging site to live can be quickly done by using the “push staging to live” feature
HOW TO RESTART YOUR STAGING ENVIRONMENT
Whenever your staging environment is stopped for any reason, there is a high chance you might see the following error message:
“501 not implemented” if this occurs, go to your site’s info tab, and select the option to “start staging environment.”
SOME IMPORTANT INFORMATION TO NOTE REGARDING STAGING
There is little information to note whenever you are using a staging environment for your WordPress project.
- Caching is disabled on a staging site
As earlier mentioned, staging environments are majorly for development, debugging, and testing purposes. In staging environments, Trulywp’s full-page caching is disabled. Also, running speed tests for your website. You will experience load times which are usually higher than average this is because the pages being loaded aren’t served up form cache.
- SEO: SEO live site settings can be complicated and prone to significant alteration with a tiny tweak. By default, staging sites have indexing turned off so that they don’t harm the SEO on your live production site. To verify this, go to the settings menu of your WordPress staging dashboard, under reading the search engine visibility should be checked.
- Staging environment credentials
Your staging environment is simply a replica of your production site, due to this fact, your WordPress admin login credentials will be the same for both your live website and your staging site. Except you deliberately implement changes to both login credentials.
- Plugins: If you have social scheduling plugins such as CoSchedule or Social Networks auto poster installed, it is good practice to deactivate these plugins on your staging site. This is to prevent these plugins from sharing to social networks using your staging URL, which could end up skewing your analytics.
5. Staging should be for Test and development purposes only: As a user, you should strictly note that the staging environment is used for development and testing only. It shouldn’t be deployed as a live production site as it is not built for this. As you would notice with a staging environment, some features don’t function correctly.